Monday, February 26, 2007

29) Painter Holes

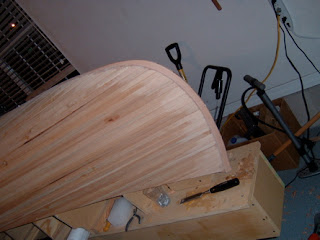
The painter is the rope attached to the front of the canoe, it serves mainly as a place to tie up the canoe. I plan on drilling the painter hole through the hull behind each stem. First I need something to drill into. I made a template of the angle of the hull behind the stems with some scrap cardboard. Next, I glued two scrap pieces of cherry together to make a solid block. Finally, I cut the angle of my template on the blocks and generously epoxied the blocks into the ends of the hull.

Next I measured and drilled the holes for the painter. I then coated the inside of the hole I drilled with epoxy - to prevent moisture from saturating the wood and starting to rot. This is where those sail grommets come in. I roughed up the "male" portion of the grommet with a file to promote epoxy adhesion. Then I coated the grommet with sanding dust thickened epoxy and hammered it into the hole....fits like a glove! It was such a simple process, but I am really pleased with the results.


Sunday, February 25, 2007

28) Glasing the Inside

Finally, the weather has broken and I have an opportunity to glass the inside of the hull. I setup my familiar glassing arrangement, lining the garage floor with plastic and setting up all my epoxy materials for easy access. Erin mixed epoxy while I wet out the glass and Elie spread the epoxy and cleaned up the massive ammount of bubbles with the auto body scraper. I only had to put on two coats of epoxy on the inside. If the inside of the hull was as smooth as the outside, we would be slipping all over the place as we entered and exited the canoe... not good. The only problem with the inside layup was the bubbles. I realize now that I should have done the epoxying while the temperature was dropping in the garage to reduce the chance of bubbling. Bubbles form as air in the wood expands (due to the heat of the epoxy). Oh well, I guess you live and learn, this is the first time I have built a boat. I will try to fill any remaining bubbles by drilling a hole and injecting epoxy into the bubble with a syringe.
Here is the layup crew.


This has to be my favorite picture (thanks Matt), the glass changing from white to clear as we wet it out.

All done.

27) Preparing to Glass the Inside

In order to glass the inside, I first laid out the remaining 6oz fiberglass inside the boat. Next, I trimmed the glass around the stems. The book (Canoecraft) suggests that I cut the glass a couple of inches short of the stems. Apparently there is plenty of strength in that area and glassing all the way to the stem will just be a pain in the butt (due to the tight location). Well, they did write the book, so that is what I did.

Matt goes for a paddle.

Another milestone, I disassembled the strongback. My friend Elie has been waiting for the plans to be drawn up for a glades skiff he has wanted for years. Jacques Mertens over at Bateau.com has finally finished the plans and has dubbed the new boat the "Flats Stalker 18". I must say, I am not a flats fishing fanatic, but I do appreciate the style of this beauty. Anyways, Elie has the plans and materials in hand, so I offered him my strongback as a solid building platform. Check out Elie's build at flatsstalker18.blogspot.com or just click the link on the right side of this page (You may see some familiar faces in Elie's photos).

We knocked together some sawhorses to support the canoe (I got the sawhorse design somewhere online, it is strong and required no fancy angled cuts - we literally built them in 15 min).

Also, don't forget to check out Bateau.com, Jacques probably has designed a boat you would be interested in (I have my eye on the Vagabond 23 - especially with the offshore cockpit mod.). Jacques seems to have the philosophy of simplicity and functionality of design, something I appreciate.

26) Seats and Thwart Started

I cut up all of that beautiful cherry and have started laying out my seats and shaping the thwart. The seats will be woven with 1/2" nylon webbing just like Chris Glad's (http://www.aracnet.com/~ncglad/canoe/canoe.htm). I also got the idea for the grommet lined painter holes from Chris.


25) Wood for Trim

The next major phase of building, I went on a shopping spree. Let's see what I bought. 15 bdft. of clear cherry (planed down to 3/4").

Half-round strip of brass (I am not 100% sure I want a brass stem band, but I bought the brass just in case).

Sail grommets. This seems like an odd purchase, but I plan on using the grommets to trim out the painter holes. Trust me, it will be cool.

Silicon bronze seat and thwart bolts (Sorry, no pic.).
Thats it!

24) Wet Out and Finish Sand

Next, I wet out the interior of the canoe (to raise the wood grain) and then I finish sanded with 120 grit. After I wet out the inside I took a bunch of pictures of the boat from different angles. the only thing holding the boat together is wood glue and the fiberglass on the outside. Although it is a bit wobbly, it is also very strong.


23) Sanding, Filling, and Sanding the Interior

This is a familiar feeling... Sanding. Next time I take on a boat building project, I am going to invest in the ear protecting headphones that have an audio connection. The most boring thing about sanding is that you cannot hear anything but the sander. The only difference in sanding the inside is that I burn through sanding discs much faster than the outside. The only part of the sandpaper that is touching the hull is the outer edges of the disc. As on the outside, I filled any cracks with epoxy thickened with sanding dust (which I have plenty of). Then sanded again.
Thats my sanding buddy Bugsy in the background.


Here I am imagining a peaceful paddle in silver river.

22) Scraping the Inside

In order to get the glue drops and excess epoxy off of the inside, I used a paint scraper that has been shaped in a curve on a bench grider. The paint scraper worked well, but is a pretty harsh tool. It takes off excess glue and wood, but not neatly. This process involved a lot of work, hunched over the boat. The thought of taking the canoe out camping along the Suwannee River keep me going at times like these.


Here is a pic of the bottom of the boat, look at that nice fair curve.

21) Flipping the boat

The last couple of times that I worked on the boat, I forgot to take my camera. During that time, I sanded the outside of the hull. I also added some extra glass under the stems, I figured that this is the area that will take a beating when I am landing the canoe on the shore. Next, I started taking out the forms in order to flip the canoe. Luckily the care I took making sure to tape each form paid off. None of the molds got stuck in the boat. After flipping, I made a cradle with some of Matt's carpet scraps.

20) Glass

Finally, time for some glass. This is a big moment in anyones canoe build, because mistakes are not easily corrected. You only have a limited work time and then the epoxy sets up and thats all she wrote. I first prepped the garage and laid out some plastic under the canoe. Next, I draped the 6oz glass over the canoe. Everyone that stopped by to look at the boat seemed concerned that I was covering up all of my nice woodwork with thtis white fabric. I assured everyone that the glass will be invisible when it is wet out. This is not a one person process. Luckily I had my girlfriend Erin and my friend Matt. Erin and Matt took turns mixing epoxy and keeping track of the time. After we got going Erin mixed epoxy and Matt was in charge of scraping the excess epoxy off of the hull. For this layer of glass, I need to put on three layers of epoxy. The first layer just wets out the fabric and bonds the glass to the hull.


The second layer fills the weave of the glass.

The third layer buries the glass, so when I sand the hull smooth I will not sand through the glass. Once this layer had set, I trimmed the excess glass off of the sheer.

Thursday, February 22, 2007

19) Curious

I laid down under the strongback just to see what it will look like when I am paddling this puppy. Can't wait to get some glass on her.

18) Finish Sanding

Before I finish sand with 120 grit, I wet the hull down. This raises the grain, so the fine grit can knock it down. Wetting the hull down is cool, you get to see what the finished product will look like. Try not to get the hull too wet, the wood glue is water soluble.

Check out the difference.

17) Fill and Fair

There is not much to write about sanding. The canoe doesn't look any different, it just feels smoother. I made a bootleg fairing board with some thin MDF and a belt sander sandpaper roll. Then I filled remaining cracks and faired the hull. Well this is what she looks like after countless hours of sanding. I should mention that the rough sanding was with 80 grit, I will finish with 120 grit.


16) Shaping, Filling, Sanding

Here is where the fun begins. With all of the staples out, I started rough shaping the hull with the block plane. This is where you begin to think..."I am taking off a lot of wood here, how thick is this hull?". Check out all of the wood shavings on the floor.


Next, I filled all of the larger cracks with epoxy thickened with sanding dust.

Now the sanding begins. I bought my Black and Decker random orbital sander for 15 bucks at a B&D outlet store, it came with a 2 year warranty and I might acturally need to use it. Anyone who builds wooden boats will tell you that the majority of your time is spent sanding. Before I figured out that I should hook the sander up to the wet dry vac this is what I looked like..... sanding, sanding, and more sanding to follow.

15) Removing Staples and Shaping the Stems

I was half expecting the canoe to fly apart once all of the staples were removed... luckily nothing happened. I enlisted the help of Matt and Erin to help me pull the 2000ish staples out of the hull (they are still talking to me). This was fairly straightforward, next I tackled shaping the stems with the block plane, spokeshave, and finally the sander. Looks good.